> For the complete documentation index, see [llms.txt](https://yuelan-icus-organization.gitbook.io/pei-tao-ji-suan-ji/llms.txt). Markdown versions of documentation pages are available by appending `.md` to page URLs; this page is available as [Markdown](https://yuelan-icus-organization.gitbook.io/pei-tao-ji-suan-ji/ros/cong-rviz-fa-song-ming-ling.md).
# 从 rviz 发送命令
## 从 rviz 发送命令[¶](https://ardupilot.org/dev/docs/ros-rviz.html#sending-commands-from-rviz)
[](https://ardupilot.org/dev/_images/ros-rviz.png)
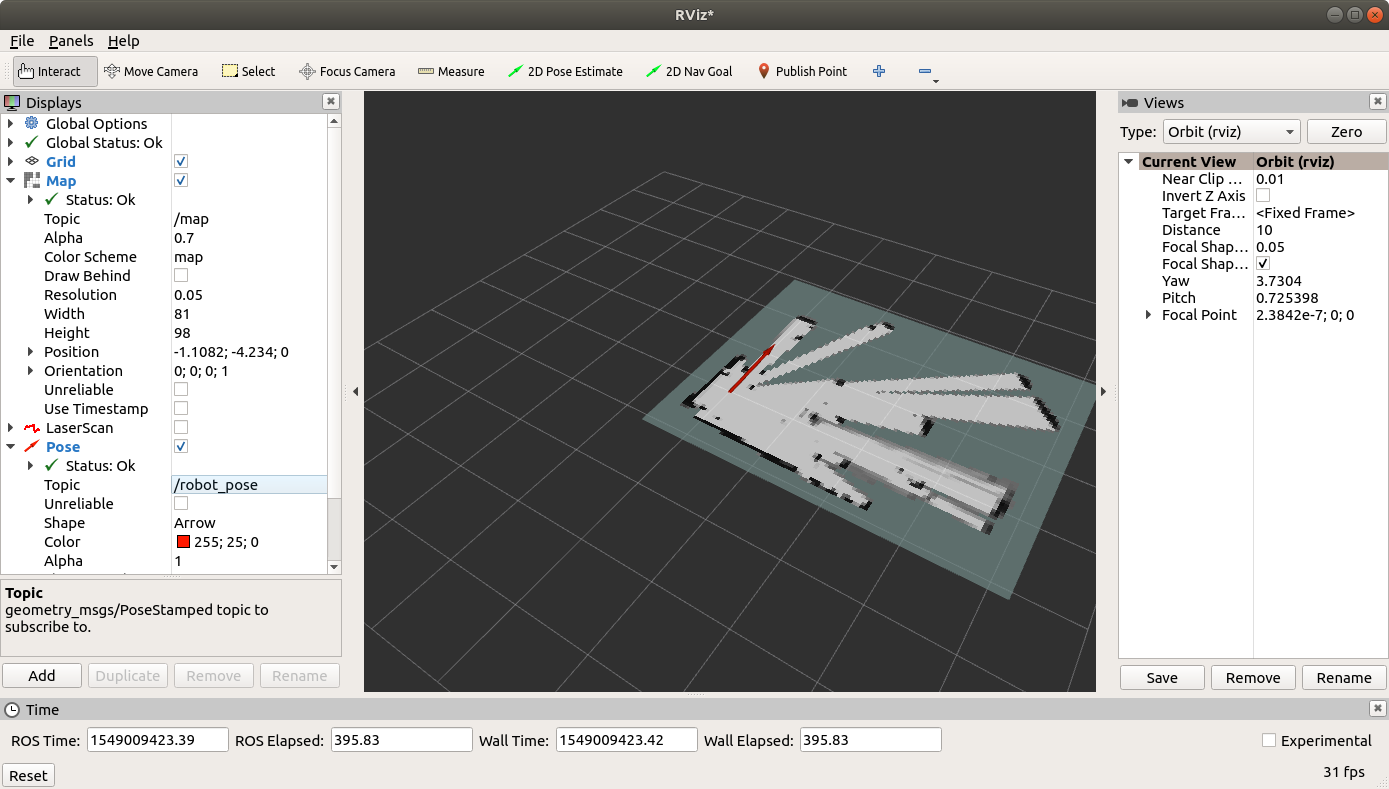
[RVIZ](http://wiki.ros.org/rviz) 允许实时查看车辆的本地位置和姿态、激光雷达数据和[制图师的 3D 地图](https://ardupilot.org/dev/docs/ros-cartographer-slam.html#ros-cartographer-slam)。也可以设置本地位置目标,并让ROS的导航库(在ArduPilot的速度控制器的帮助下)将车辆移动到目标。
这些指令在运行[APSync映像](https://ardupilot.org/dev/docs/apsync-intro.html#apsync-intro)并安装了ROS的[Nvidia TX2](https://ardupilot.org/dev/docs/companion-computer-nvidia-tx2.html#companion-computer-nvidia-tx2)上进行了测试,如此[处](https://ardupilot.org/dev/docs/ros-install.html#ros-install)所述。此页面上的一些信息可在以下维基页面上找到:
* [ros.org's NetworkSetup](http://wiki.ros.org/ROS/NetworkSetup)
* [answers.ros.org 的 “How to to Run Rviz remote”](https://answers.ros.org/question/10343/how-to-run-rviz-remotely/)
* [answers.ros.org的“rostopic list有效,但rostopic echo不起作用”](https://answers.ros.org/question/48240/rostopic-list-works-but-rostopic-echo-does-not/)
### 客户端电脑设置[¶](https://ardupilot.org/dev/docs/ros-rviz.html#client-pc-setup)
* 在客户端 PC(rviz 将运行的地方)上安装 ROS“桌面完整”。
* 连接到车辆的wifi接入点(如果使用APSync,则默认用户名/密码为ardupilot/ardupilot)
* 打开命令提示符并检查是否可以“ping”运行 ROS 的配套计算机。如果使用 APSync,这两个命令都应该有效
```
ping 10.0.1.128
ping apsync.local
```
* 使用您喜欢的编辑器打开文件(可能需要使用 sudo),并确保配套计算机出现在列表中。以下是配套计算机运行APSync时应显示的内容`/etc/hosts`
```
10.0.1.128 apsync.local
10.0.1.128 apsync
```
* 在新的命令提示符下,键入以获取客户端电脑的名称`hostname`
* 使用您喜欢的编辑器将以下两行添加到底部`~/.bashrc`
```
export ROS_HOSTNAME=your-host-name.local <--- substitute the client PC's name here
export ROS_MASTER_URI=http://apsync.local:11311
```
### 配套计算机设置[¶](https://ardupilot.org/dev/docs/ros-rviz.html#companion-computer-setup)
* SSH 到配套计算机上。如果使用APsync,则以下内容应该有效(密码为“apsync”)
```
ssh apsync@apsync.local
```
* 使用您喜欢的编辑器将以下行添加到底部`~/.bashrc`
```
export ROS_HOSTNAME=apsync.local
export ROS_MASTER_URI=http://apsync.local:11311
```
### 检查 ROS 数据在客户端上是否可用[¶](https://ardupilot.org/dev/docs/ros-rviz.html#check-ros-data-is-available-on-the-client)
要确认客户端笔记本电脑可以从车辆中检索数据,请尝试以下命令
```
rostopic list
rostopic echo /robot_pose
```
### 启动 rviz[¶](https://ardupilot.org/dev/docs/ros-rviz.html#start-rviz)
* 在客户端 PC 上启动 rviz
```
rosrun rviz rviz
```
* 查看实时激光雷达数据
> * 在显示区域中,选择“添加”,“激光扫描”
> * 添加后,展开“激光扫描”部分并将“主题”设置为“/scan”
* 查看环境地图
> * 选择“添加”、“地图”
> * 添加后,展开“地图”部分并将“主题”设置为“/map”
* 查看车辆的当前航向(根据 ROS)
> * 选择“添加”,“姿势”
> * 添加后,展开“姿势”部分并将“主题”设置为“/robot\_pose”
### 发送位置目标[¶](https://ardupilot.org/dev/docs/ros-rviz.html#sending-position-targets)
* 要允许 ROS 通过 mavros 将位置目标发送到 ArduPilot,请登录运行 ROS 的 Companion Computer 并使用您喜欢的编辑器修改 mavros 的 node.launch 文件(如下所示的 gedit)
```
roscd mavros <-- this assumes mavros has been installed with rosdep
cd launch
sudo gedit node.launch
```
* 添加如下所示的一行并重新启动所有ROS进程后``
```
```
* 布防车辆并切换到引导模式
* 在 rviz 中,单击“2D 导航目标”按钮,然后单击并按住地图上的鼠标按钮以瞄准绿色箭头(这将设置目标位置和最终姿态),然后释放鼠标按钮
* 地面站应显示飞行器正在移动的目标位置(任务规划器在目标位置放置一个绿色标记,并从车辆上向目标绘制一条橙色线)
如果一切未按预期进行,以下命令可能有助于诊断问题
* `rostopic info /move_base_simple/goal`应将发布者显示为“rviz”,将订阅者显示为“mavros”
* `rostopic echo /move_base_simple/goal`应在设置“2D 导航目标”后的瞬间显示“位置”和“方向”
* `rosrun rqt_graph rqt_graph`显示了 ROS 节点及其连接的图形图